The vast majority of development I perform is in C++17 on an Apple Mac Computer using Xcode. For a while now, I have been using Catch2 as my Unit Testing framework, and its absolutely excellent. But its not integrated into the Xcode IDE and I wanted the ability to use Xcode’s excellent testing and test debugging tools to improve my productivity and workflow.
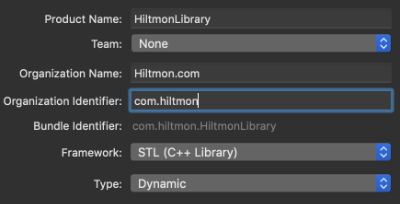
In this post I will show you how to set up a simple standard C++17 library project in Xcode 10 and then add XCTests to it.
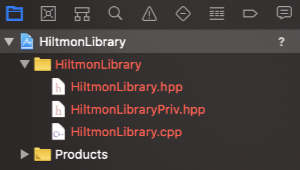
Compile with CMD-B and the library should compile OK. If you expand the Products folder, you should see the compiled library. Note that a bug in Xcode 10 means that you may need to restart Xcode for it to stop showing as red.
Setting Up the Tests
Great, we have an awesome library, how do we go about testing it?
Create and integrate the Test Target
Press CMD-6 to show the Test Navigator (or select the icon to the right)
At the bottom, click the plus and choose New Unit Test Target…
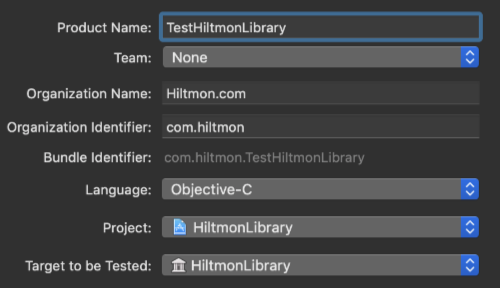
I prefer to make a strong name for test targets, so I named mine TestHiltmonLibrary.
Make sure Objective-C is selected as the language and that the test target is your library (in my case HiltmonLibrary)
Click Finish to create the target
Xcode helpfully shows you the new Target configuration page.
Update for C++17
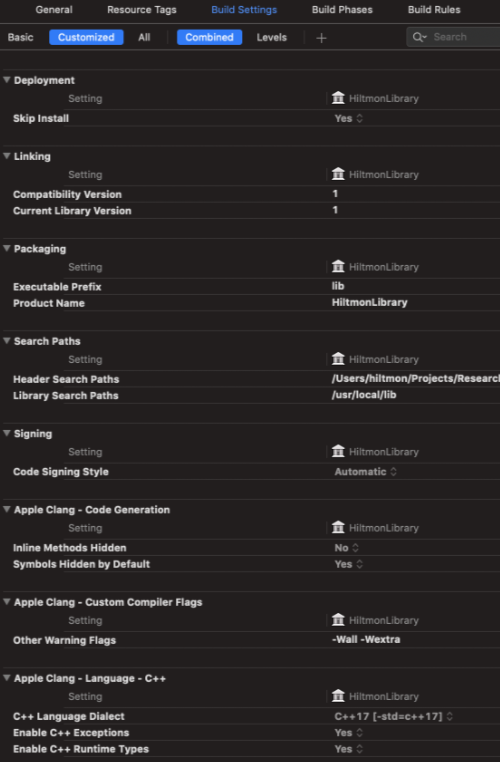
Lets bring it up to C++17 standard (same as for the main library project):
Click on Build Settings, then type C++ in the search box. Change the C++ Language Dialect to C++17 [-std=c++17].
Search for Inline and change Inline Methods Hidden to No.
Search for Other Warning and double-click to the right of Other Warning Flags. Click + to add the following flags:
-Wall
-Wextra
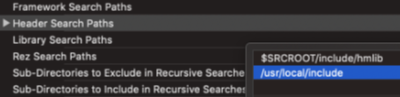
Search for Search and double-click to the right of Header Search Paths. Click + to add the following flags:
$SRCROOT/include/hmlib
/usr/local/include
While there, double-click to the right of Library Search Paths. Click + to add the following flags:
/usr/local/lib
And to standardize the project:
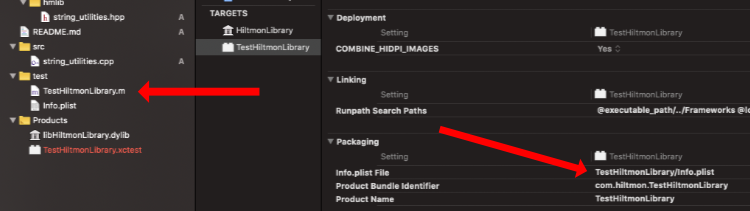
Drag and drop the Info.plist and TestHiltmonLibrary.m file to under the tests folder.
Delete the TestHiltmonLibrary folder.
The reconnect the Info.plist
Click on the Project name in the Project Navigator, and choose the test target.
Change the Info.plist File entry to test/Info.plist.
Integrate with the Main Library Project
And finally, hook it all up:
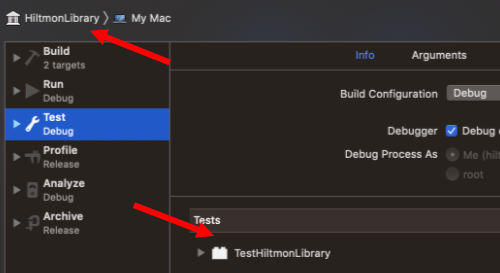
Click on Product, Scheme, Edit Scheme…, right-click on the scheme in the tool bar and choose Edit Scheme, or press CMD-<.
Make sure the scheme selected is the Library scheme (HiltmonLibrary), not the Test scheme (TestHiltmonLibrary) in the top left of the sheet that shows up.
Click on Test on the left.
Click the plus at the bottom to add a test target and choose the test target (now add TestHiltmonLibrary).
Click Close when done.
Lets Compile and Run the tests to see what happens. Press CMD-U. Xcode will:
Compile the main Library
Compile the test Target
Run the tests
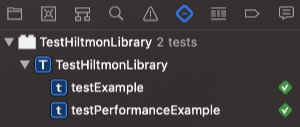
Switch you to the Test Navigator
Since no tests have been created, it should have no failures.
Thats it, the hoops have been jumped through to set things up. From now on, all you need to care about is developing your project code and your new tests.
Adding The First Tests
Let’s add our first C++17 tests.
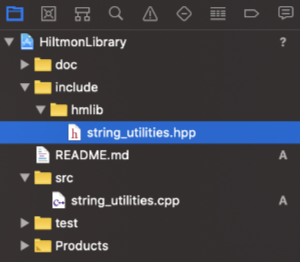
Rename the default file TestHiltmonLibrary.m to better reflect the tests being run, in this case we’re testing our String Utilities, so rename it to TestStringUtilities.mm
NOTE THE FILE EXTENSION CHANGE FROM .m TO .mm. This is the secret, it tells Clang to compile the file as Objective-C++ which is how we get XCTest to talk C++.
Include the header of the class being tested
#include"string_utilities.hpp"
Remove the current functions and add the test function
- (void)testCaseChanges {

}
FOR XCTEST TO WORK, THE FUNCTION MUST START WITH test.
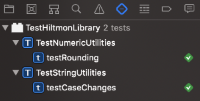
Press CMD-U to run the tests. Xcode will run the tests and put a bezel up that tests have passed and puts a green checkmark next to the test functions that passed.
Since this is a header-only file, the compiler will pretty much do nothing with it when building the library. So let’s add a test to get it to compile and see it this mad round code works.
Go to the test Navigator. Click the plus and choose New Unit Test Class….
Name it TestNumericUtilities.mm. REMEMBER the .mm extension to get C++.
Clean it up and make it ready for the test.
Include the header file #include "numeric_utilities.hpp".
Press CMD-U to compile the Library and run the tests.
Since the header file is included in the test compile, the compiler looks at it (and will fail if there are any issues).
If the compilation succeeds, it will run the tests.
C++17 Tests with XCTest in Xcode
And there you have it, a standard C++17 project, editable and compilable in Xcode, with single key access to tests and all the IDE features of Xcode to help debug and analyze your project.
A few tricks you can add:
Setting a breakpoint in a test case will work as expected. Xcode will stop testing there and you’ll be able to use all the debugger tools in Xcode to see what is going on.
Hover over a Test Class in the Test Navigator or place your mouse on any line, and you will see a small right triangle icon with a circle appear. Click that to run just that one test class. That way you can work an individual test until such time as it works without having to wait for and run all test cases.